
Arduino Robot Wiring
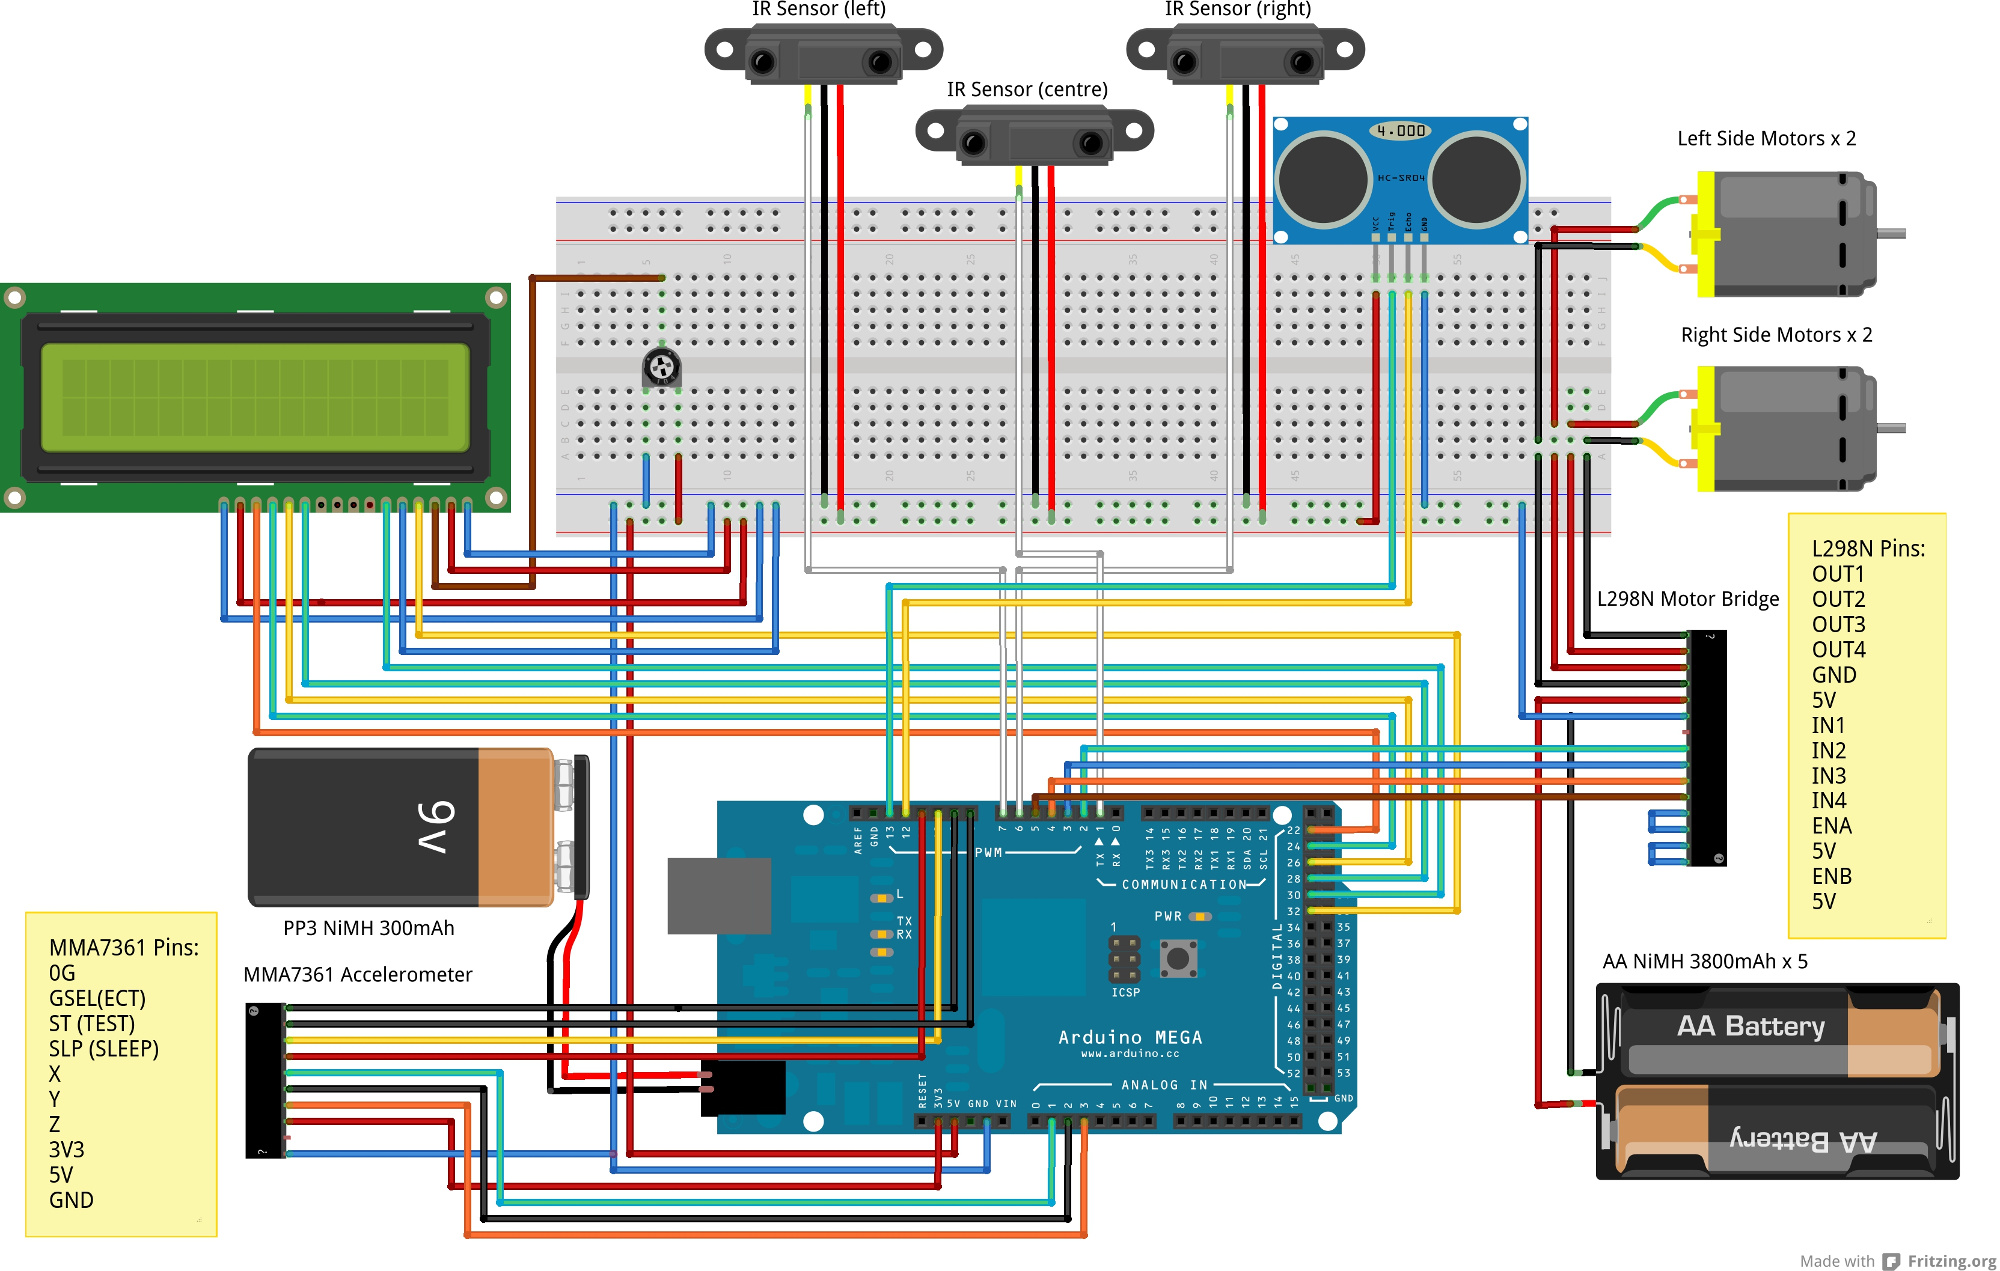
Below is a wiring diagram for the robot made using fritzing. The wiring colours used are not important, just use whatever you have available.
The best approach to wiring your own robot is to connect up the various components one at a time testing that each is working as you go. Start with the LCD as that has the most connections and once you have it working you can easily add some print statements to your code so you can use it to check that the other components are all working correctly.
It is quite likely that your motor shield and accelerometer may require slightly different connections from those that I purchased. If this is the case then search online for any documentation to help you to wire them correctly.
Return to home page.